
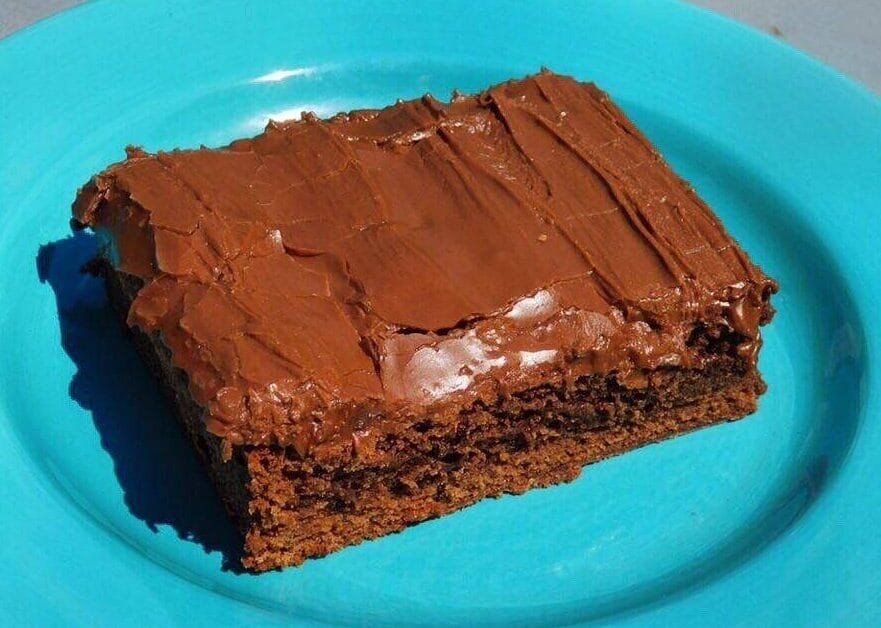
If you love old-fashioned brownies with a rich chocolate flavor and a smooth layer of frosting, these Lunch Lady Brownies are a nostalgic treat worth making.
Inspired by the classic brownies once served in school cafeterias, this recipe delivers a soft, chocolatey brownie with a simple homemade cocoa frosting. The brownie itself uses melted butter, cocoa powder, flour, sugar, eggs, and vanilla, while the frosting adds another layer of chocolate richness.
The original recipe describes these brownies as a nostalgic dessert inspired by a method that has been around for decades. It uses a 9-by-13-inch pan and bakes the brownies at 350°F for about 20 to 25 minutes.
Why You’ll Love These Lunch Lady Brownies
These brownies are wonderfully simple.
There is no need for complicated chocolate melting or special equipment. The butter is melted, the ingredients are combined, the batter goes into a sheet pan, and the brownies are baked.
The frosting is just as easy. Melted butter, milk, powdered sugar, cocoa, and vanilla are whisked together to create a thick, spreadable topping.
The result is soft, rich, and sweet, with a classic homemade chocolate flavor.
They’re perfect for:
- Family gatherings
- Potlucks
- Bake sales
- School events
- Birthday parties
- Afternoon snacks
- Holiday dessert tables
Ingredients You’ll Need
For the Brownies
- 1 cup butter, melted
- 1/2 cup unsweetened cocoa powder
- 2 cups all-purpose flour
- 2 cups granulated sugar
- 1/2 teaspoon salt
- 4 large eggs
- 3 tablespoons vanilla extract
For the Frosting
- 1/4 cup butter, melted
- 1/4 cup milk
- 3 cups powdered sugar
- 1/4 cup unsweetened cocoa powder
- 1 tablespoon vanilla extract
These quantities come from the published recipe.
How to Make Lunch Lady Brownies
1. Prepare the Pan
Preheat your oven to 350°F.
Line a 9-by-13-inch baking pan with parchment paper, leaving a little overhang along the sides.
Lightly grease the parchment if desired.
The parchment makes it much easier to lift the cooled brownies from the pan and cut them into neat squares.
2. Mix the Melted Butter and Cocoa
Pour the melted butter into a large mixing bowl.
Add the cocoa powder.
Whisk until the cocoa is completely incorporated and the mixture looks smooth.
The melted butter helps the cocoa bloom, giving the brownies a deeper chocolate flavor.
3. Combine the Dry Ingredients
In another bowl, combine the flour, sugar, and salt.
Whisk everything together so the salt is evenly distributed.
You don’t need to use a mixer for this recipe.
4. Combine the Wet and Dry Mixtures
Gradually add the dry ingredients to the butter-and-cocoa mixture.
Stir until the ingredients are mostly combined.
Add the eggs and vanilla extract.
Mix until you have a smooth, thick brownie batter.
Be careful not to overmix. Once the flour is incorporated, stop stirring.
5. Spread the Batter
Pour the brownie batter into the prepared 9-by-13-inch pan.
Use a spatula to spread it evenly into the corners.
The batter should form an even layer so the brownies bake consistently.
6. Bake
Place the pan in the preheated oven.
Bake for approximately 20 to 25 minutes.
Begin checking around 20 minutes.
Insert a toothpick into the center. It should come out clean or with a few moist crumbs attached.
The original recipe uses 350°F and a 20-to-25-minute baking window.
Avoid overbaking if you want soft, tender brownies.
How to Make the Chocolate Frosting
While the brownies are baking, prepare the frosting.
1. Combine the Butter and Milk
Place the melted butter and milk in a medium bowl.
Whisk until combined.
2. Add Cocoa and Powdered Sugar
Add the cocoa powder and powdered sugar.
Whisk everything together until smooth.
The frosting should become thick and spreadable.
3. Add Vanilla
Stir in the vanilla extract.
Taste the frosting and adjust the consistency if necessary.
If it seems too thick, add milk one tablespoon at a time until it becomes easy to spread. The original recipe recommends this adjustment when needed.
When Should You Frost the Brownies?
Don’t frost the brownies immediately after taking them out of the oven.
Allow them to cool for approximately 15 to 20 minutes first.
The brownies should still be slightly warm but not hot.
If they’re too hot, the frosting can melt and become difficult to control.
Once the brownies have cooled enough, spread the frosting evenly over the surface.
Then allow the brownies to cool completely before slicing.
How to Get Soft, Fudgy Brownies
The most important thing is to avoid overbaking.
Brownies continue cooking slightly from residual heat after they come out of the oven.
If you bake them until they’re completely dry in the center, they’ll lose the soft texture that makes this recipe so good.
Start checking around the 20-minute mark.
A toothpick should come out clean or with a few moist crumbs, rather than being coated in raw batter.
Can You Add Nuts?
Absolutely.
Chopped pecans or walnuts are excellent additions.
Fold approximately 1/2 to 1 cup of chopped nuts into the brownie batter before transferring it to the pan.
You can also sprinkle chopped nuts over the frosting while it is still soft.
Pecans work particularly well with the rich chocolate flavor.
Easy Lunch Lady Brownie Variations
Peanut Butter Brownies
Spread a thin layer of peanut butter over the cooled brownies before adding the chocolate frosting.
You can also stir chopped peanut butter cups into the batter.
The original recipe specifically suggests peanut butter frosting and chopped peanut butter cups as variations.
Mint Chocolate Brownies
Add a small amount of peppermint or mint extract to the frosting.
For a festive appearance, you can add a little green food coloring.
The published recipe also suggests mint extract and green coloring as a variation.
Walnut Brownies
Fold chopped walnuts into the batter for a classic chocolate-and-nut combination.
Strawberry Brownies
Serve the finished brownies with fresh strawberries and whipped cream for a simple dessert.
Brownie Sundaes
Warm a brownie slightly and top it with vanilla ice cream, chocolate sauce, and chopped nuts.
How to Cut Clean Brownie Squares
Let the brownies cool completely before cutting.
Use a large, sharp knife.
For cleaner cuts, wipe the knife with a damp cloth between slices.
If you want very neat squares, chill the brownies briefly before cutting.
The original recipe can be portioned into approximately 12 servings, although you can cut the pan into smaller pieces for parties or larger batches of bite-size desserts.
How to Store Lunch Lady Brownies
Keep the brownies in an airtight container.
According to the original recipe, cut brownies can be kept at room temperature for about 1 to 2 days, while an uncut batch can last around 4 days when properly covered.
For longer storage, refrigerate them for up to about a week.
Allow refrigerated brownies to come closer to room temperature before serving for the softest texture.
Can You Freeze Them?
Yes.
Wrap individual brownies tightly in plastic wrap and place them in a freezer-safe container or bag.
The original recipe gives a freezer storage time of approximately 3 months.
Thaw the brownies in the refrigerator or at room temperature before serving.
Freezing individual portions is particularly convenient when you want a quick homemade dessert without baking another batch.
Tips for the Best Lunch Lady Brownies
Use good-quality cocoa powder. Since chocolate is the main flavor, the cocoa makes a noticeable difference.
Don’t overmix the batter. Stir just until the ingredients are combined.
Don’t overbake. Slightly underbaked is better than dry for this style of brownie.
Cool before frosting. Give the brownies about 15 to 20 minutes before adding the topping.
Adjust frosting consistency gradually. Add milk a tablespoon at a time if the frosting is too thick.
Let the frosting set. Allow the finished brownies to cool completely before slicing.
Frequently Asked Questions
Why are they called Lunch Lady Brownies?
The name refers to the nostalgic school-cafeteria-style brownie that inspired this recipe. The published version presents the dessert as a traditional recipe associated with memories of school lunches.
Can I use a smaller pan?
Yes, but the brownies will be thicker and will likely require additional baking time. A 9-by-13-inch pan gives the intended thickness.
Can I use salted butter?
Yes. If using salted butter, you may want to reduce or omit the added salt in the brownie batter.
Can I reduce the vanilla?
Yes. The recipe uses a generous amount of vanilla, but you can adjust it according to your taste.
Why is my frosting too thick?
Add milk gradually, about one tablespoon at a time, until the frosting reaches a smooth, spreadable consistency.
Why did my brownies turn out dry?
They were likely baked too long. Begin checking around 20 minutes and remove them when a toothpick comes out clean or with a few moist crumbs.
A Classic Chocolate Dessert
Lunch Lady Brownies are the kind of dessert that doesn’t need fancy ingredients or complicated decoration.
A simple chocolate brownie base, topped with homemade cocoa frosting, is all it takes to create a pan full of rich, nostalgic treats.
Make them for a family gathering, take them to a potluck, or keep a batch in the kitchen for afternoon cravings.
They’re easy, chocolatey, and wonderfully old-fashioned—the kind of brownies that remind you why simple recipes often become the ones people remember most.