
free web hit counter

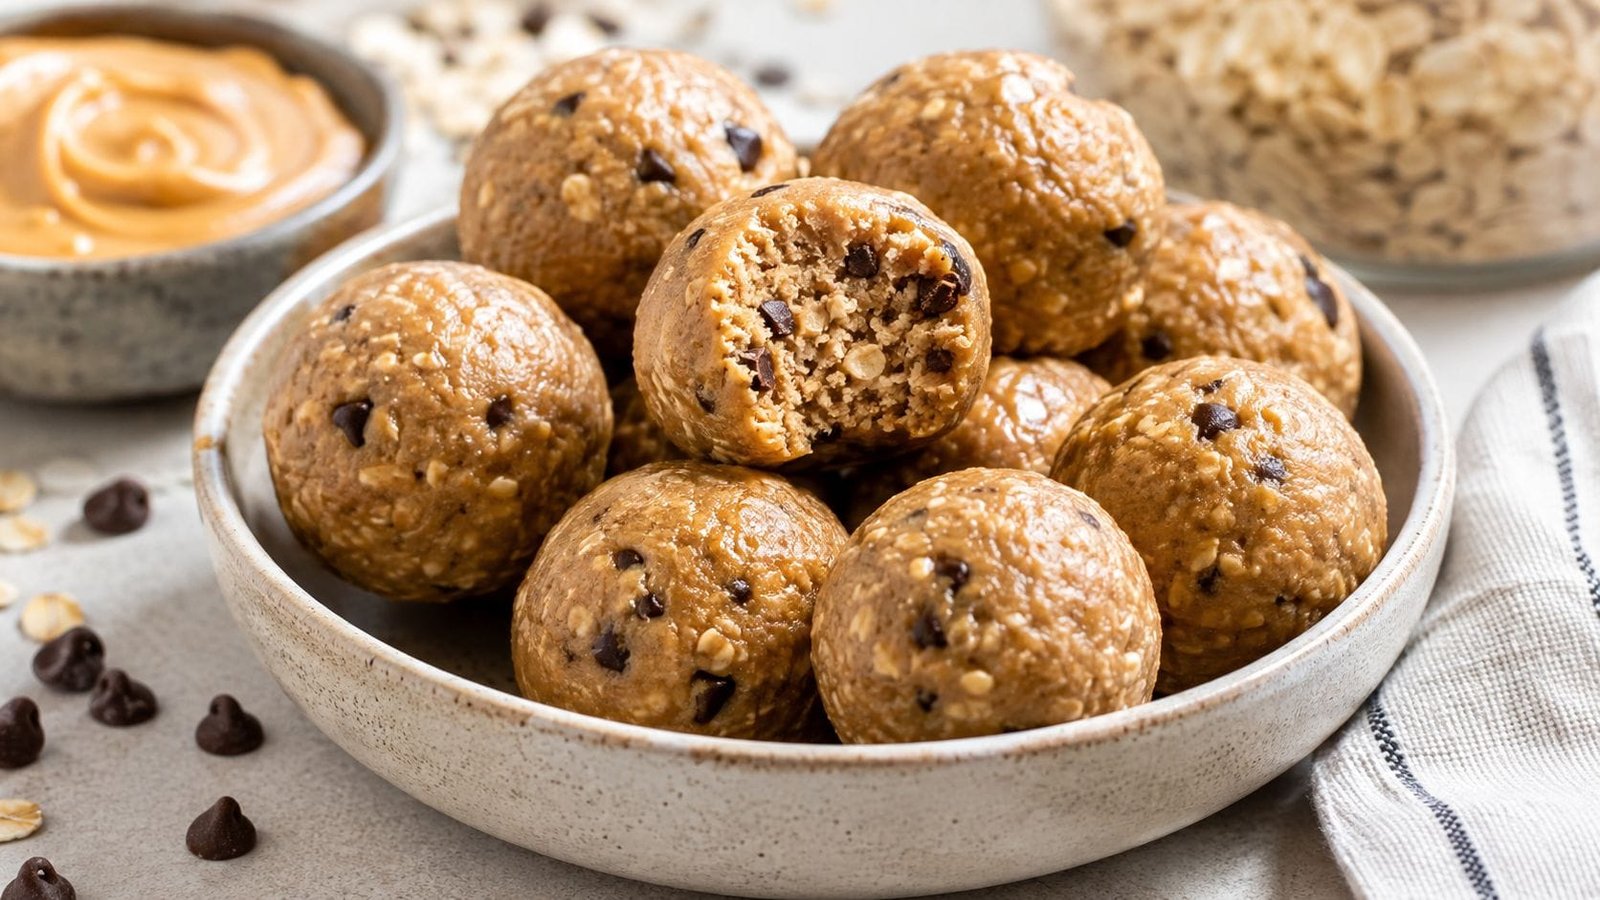
No-Bake Protein Balls (Easy, Healthy & Perfect for Busy Days)

by Alexa Maks

If you’ve ever opened your pantry looking for something sweet, only to realize every option is loaded with sugar, you’re not alone. Finding a snack that tastes like a treat while still offering wholesome ingredients can feel almost impossible. That’s exactly why these No-Bake Protein Balls have become one of the most popular homemade snacks for busy families, fitness lovers, and anyone who enjoys simple recipes that actually work.

These bite-sized treats are soft, chewy, naturally satisfying, and incredibly easy to make. You don’t need an oven, a mixer, or any special baking skills. Everything comes together in one bowl using simple pantry staples that many people already have at home.

Whether you need a quick breakfast before work, a healthy afternoon snack, something to pack in lunch boxes, or a little energy boost after a workout, these protein balls are always ready when you are.

But here’s something that surprises most first-time makers…

Many people think the recipe is impossible to mess up. They simply mix everything together, roll the mixture into balls, and call it a day. While that method works, it doesn’t always produce the soft, rich texture that makes these snacks so addictive.

A few tiny adjustments can completely transform the final result.

By the time you finish this guide, you’ll know exactly how to make protein balls that stay soft for days, hold together perfectly, and taste even better than many expensive store-bought protein snacks.

Why Everyone Loves These No-Bake Protein Balls

The biggest reason these little snacks have become so popular is their simplicity.

Unlike traditional cookies or muffins, there’s no waiting for the oven to preheat. There’s no worrying about overbaking or underbaking. Everything is mixed together, chilled, rolled into bite-sized portions, and enjoyed whenever hunger strikes.

They’re also incredibly versatile.

Some people enjoy them with their morning coffee.

Others pack them for work because they’re easy to carry and don’t require refrigeration for short periods.

Parents love making them for lunch boxes because they’re quick to prepare ahead of time.

Fitness enthusiasts appreciate how easy it is to increase the protein content simply by adding their favorite protein powder.

No matter your lifestyle, these protein balls easily fit into your weekly routine.

Before You Grab Your Mixing Bowl…

Here’s one simple trick that many recipes never mention.

Don’t measure your peanut butter and immediately start mixing.

Instead, stir the peanut butter first.

Natural peanut butter often separates while sitting on the shelf, leaving oil at the top and thicker peanut butter underneath.

If you scoop it without mixing, your protein balls may become either too dry or too sticky.

Taking one minute to stir the jar creates a much smoother mixture and gives you consistent results every time.

It’s a small detail, but it’s one that experienced home cooks never skip.

Related Articles

2-Ingredient High Protein Bread Recipe

Ultimate Crunchy Tuna Salad

3-Ingredient Chocolate Cloud Cakes

Creamy Chocolate Custard Dessert

Ingredients

One of the best things about this recipe is that every ingredient serves a purpose.

You’ll need:

  • 1½ cups rolled oats
  • ½ cup natural peanut butter
  • ⅓ cup honey
  • 2 tablespoons unsweetened cocoa powder
  • 1 teaspoon pure vanilla extract
  • ¼ cup mini chocolate chips
  • 2 tablespoons ground flaxseed (optional)
  • Pinch of salt

These everyday ingredients work together to create a snack that’s rich, chewy, naturally sweet, and satisfying.

If you enjoy experimenting in the kitchen, you’ll also discover that this recipe is incredibly forgiving. Small changes can create completely new flavors without changing the basic method.

Why Each Ingredient Matters

Rolled Oats

Rolled oats create the hearty texture that makes these protein balls so satisfying. They absorb moisture from the peanut butter and honey while giving every bite a pleasant chew.

Quick oats can work in a pinch, but rolled oats provide a better texture and prevent the mixture from becoming overly soft.

Peanut Butter

Peanut butter acts like the glue that holds everything together.

It also adds natural richness, creaminess, and healthy fats that make these snacks filling.

Natural peanut butter usually gives the best flavor, although regular creamy peanut butter also works well.

Honey

Honey isn’t just there for sweetness.

It binds the ingredients together while adding moisture that keeps the protein balls soft.

Maple syrup can be substituted if you prefer a different flavor.

Cocoa Powder

Unsweetened cocoa powder creates a deep chocolate flavor without making the recipe overly sugary.

Using good-quality cocoa powder makes a noticeable difference.

Chocolate Chips

Mini chocolate chips melt slightly as they mix into the warm peanut butter, creating tiny bursts of chocolate throughout every bite.

They’re optional—but once you’ve tried them, you’ll probably never leave them out again.

The Biggest Mistake People Make

Most people assume that if the mixture looks mixed, it’s ready.

Not quite.

Texture matters much more than appearance.

Pick up a spoonful and gently squeeze it in your hand.

Does it hold together?

Perfect.

Does it crumble?

Add another spoonful of peanut butter.

Does it stick to your fingers?

Mix in a handful of rolled oats.

This quick test takes only a few seconds, yet it prevents almost every common problem people experience when making homemade protein balls.

In fact, many experienced home cooks say this simple adjustment is the difference between a batch that’s “good” and one that’s impossible to stop eating.

Step-by-Step Instructions

Now that you understand what makes these protein balls successful, it’s time to put everything together. Don’t rush the process. Although this recipe takes only a few minutes to prepare, paying attention to each step will give you a noticeably better result.

Step 1: Combine the Dry Ingredients

In a large mixing bowl, add the rolled oats, cocoa powder, ground flaxseed, and a pinch of salt. Stir everything together until the cocoa powder is evenly distributed.

This simple step ensures every bite has the same rich chocolate flavor instead of pockets of dry cocoa.

Step 2: Add the Wet Ingredients

Pour in the peanut butter, honey, and vanilla extract.

Using a sturdy wooden spoon or silicone spatula, begin mixing everything together.

At first, the mixture may seem too dry. Keep stirring. As the peanut butter blends with the honey, everything will slowly come together into a thick, sticky mixture.

Don’t worry if it doesn’t look perfect yet.

Step 3: Fold in the Chocolate Chips

Once the mixture is well combined, gently fold in the mini chocolate chips.

Avoid overmixing.

You want the chocolate chips spread evenly throughout the mixture while keeping their shape.

Stop for Just One Minute…

Before rolling anything, take a small spoonful and taste it.

This is the easiest time to customize the recipe.

Ask yourself:

  • Would you like a little more chocolate?
  • Is it sweet enough?
  • Would another spoonful of peanut butter make it even creamier?
  • Would cinnamon or shredded coconut make it even better?

Professional recipe developers rarely stop after following a recipe exactly.

They taste.

They adjust.

That’s often what transforms a good recipe into one you’ll make over and over again.

The 30-Minute Secret Most People Skip

Here’s something interesting.

If you roll the protein balls immediately, they’ll usually be softer and slightly sticky.

If you chill the mixture for about 30 minutes first, something amazing happens.

The oats absorb moisture.

The peanut butter firms up.

The flavors blend together.

Rolling becomes much easier.

The finished protein balls also keep their shape much better.

Those extra 30 minutes may feel like a delay, but they’re one of the biggest reasons homemade protein balls taste so much better the next day.

Rolling the Perfect Protein Balls

Once chilled, scoop about one tablespoon of the mixture.

Roll it gently between your palms.

Don’t squeeze too hard.

Gentle pressure creates smooth, round protein balls with a soft interior.

Place each finished ball on a parchment-lined plate or tray.

Continue until all of the mixture has been used.

You’ll usually end up with around 18 bite-sized protein balls depending on how large you make them.

Here’s What Happened When I Tried Two Different Batches

One afternoon, I decided to test something.

I made two identical batches.

The first batch was rolled immediately after mixing.

The second batch rested in the refrigerator for 30 minutes before rolling.

The difference was obvious.

The chilled mixture was easier to handle.

The balls looked smoother.

They stayed together better.

Even more surprising, the flavor seemed richer after chilling because the cocoa, honey, and peanut butter had more time to blend together.

Since then, I never skip the resting time.

Sometimes the smallest steps make the biggest difference.

Easy Ways to Add More Protein

These protein balls are already satisfying, but increasing the protein content is simple.

You can add:

  • One scoop vanilla protein powder
  • Chocolate protein powder
  • Unflavored protein powder
  • Hemp hearts
  • Chia seeds
  • Powdered peanut butter

If adding protein powder, remember it absorbs moisture.

You may need one or two tablespoons of milk to keep the mixture soft enough to roll.

Five Delicious Flavor Variations

One reason people never get bored of this recipe is how easy it is to customize.

Chocolate Peanut Butter

Add extra cocoa powder and dark chocolate chips.

Coconut Chocolate

Mix shredded unsweetened coconut into the mixture.

Roll each protein ball in coconut before chilling.

Cinnamon Roll

Add one teaspoon of cinnamon and a pinch of nutmeg for a warm bakery-style flavor.

Espresso Chocolate

A small amount of instant espresso powder deepens the chocolate flavor beautifully.

Cookie Dough

Skip the cocoa powder and use vanilla extract with mini chocolate chips for a cookie dough-inspired version.

Make Once, Enjoy All Week

Imagine opening your refrigerator after a long day.

You’re hungry.

Dinner isn’t ready yet.

Instead of reaching for chips or cookies, you grab a homemade protein ball.

No cooking.

No preparation.

Just a delicious snack waiting for you.

That’s exactly why so many people make these every Sunday as part of their weekly meal prep.

They’re ready whenever life gets busy.

Storage Tips

One of the biggest advantages of these no-bake protein balls is that they store beautifully. In fact, many people think they taste even better after they’ve had a chance to chill overnight. The flavors blend together, the texture becomes firmer, and every bite feels richer.

Store the protein balls in an airtight container in the refrigerator for up to one week. If you’re making a large batch for meal prep, you can freeze them for up to three months. Simply place them in a freezer-safe container with a sheet of parchment paper between layers to prevent sticking.

When you’re ready to enjoy one, let it sit at room temperature for about 10 minutes. It’ll soften slightly and taste freshly made.

Common Mistakes to Avoid

Even though this recipe is simple, a few small mistakes can affect the final texture.

Using Too Much Honey

More honey isn’t always better. Too much liquid makes the mixture sticky and difficult to roll. Stick to the recommended amount, then adjust only if necessary.

Skipping the Chill Time

Many people are in a hurry and skip chilling the mixture. While you can roll it immediately, chilling creates a firmer texture and makes shaping much easier.

Not Mixing Thoroughly

Dry pockets of oats or cocoa powder can leave the finished protein balls uneven in flavor. Mix until every ingredient is fully incorporated.

Using Dry Peanut Butter

Natural peanut butter should be stirred well before measuring. If it’s too dry, your mixture may crumble instead of holding together.

Healthy Ingredient Swaps

One of the reasons this recipe has become so popular is how flexible it is. You can easily adapt it to match your preferences or what you already have in your pantry.

Instead of peanut butter, try almond butter, cashew butter, or sunflower seed butter.

Instead of honey, use maple syrup or date syrup.

Instead of chocolate chips, stir in chopped walnuts, pecans, raisins, dried cranberries, or shredded coconut.

Want even more crunch? Add chopped roasted peanuts or pumpkin seeds.

Every variation creates a slightly different flavor, making it easy to enjoy this recipe again and again without getting bored.

Why Homemade Always Wins

Store-bought protein snacks may seem convenient, but they often contain preservatives, artificial flavors, and ingredients that are hard to pronounce.

Homemade protein balls give you complete control over what goes into your food.

You choose the ingredients.

You control the sweetness.

You can increase the protein, reduce the sugar, or add your favorite flavors without paying premium prices for packaged snacks.

That’s one of the biggest reasons so many people switch to homemade versions after trying this recipe once.

Frequently Asked Questions

Can I make these without protein powder?

Absolutely. This recipe is delicious without protein powder. The peanut butter and oats already provide a satisfying snack.

Can I freeze them?

Yes. Freeze them in an airtight container for up to three months. Let them thaw for a few minutes before eating.

Can kids enjoy these?

Definitely. Kids love the soft texture and chocolate flavor, making them a great addition to lunch boxes or after-school snacks.

Are these gluten-free?

They can be if you use certified gluten-free rolled oats.

What if my mixture is too dry?

Add another tablespoon of peanut butter or a small drizzle of honey and mix again.

What if it’s too sticky?

Add a few extra tablespoons of rolled oats until the mixture becomes easy to handle.

Can I use crunchy peanut butter?

Yes. Crunchy peanut butter adds extra texture and a delicious nutty bite.

How can I make them even more filling?

Mix in hemp hearts, chia seeds, or a scoop of your favorite protein powder for additional protein and fiber.

Approximate Nutrition (Per Protein Ball)

The exact nutrition depends on the ingredients you choose, but one protein ball typically contains:

  • Calories: 120–140
  • Protein: 5–7 grams
  • Carbohydrates: 12–15 grams
  • Fat: 6–8 grams
  • Fiber: 2–3 grams

These values are estimates and may vary depending on the brand of ingredients used.

Final Thoughts

These No-Bake Protein Balls prove that healthy snacking doesn’t have to be difficult or time-consuming. With just a handful of simple ingredients and a few minutes of preparation, you can create a snack that’s delicious, satisfying, and perfect for almost any time of day.

Whether you’re meal prepping for the week, packing lunches, fueling up after a workout, or simply looking for a healthier alternative to store-bought sweets, this recipe is one you’ll come back to again and again.

The best part isn’t just how easy they are to make—it’s knowing that every bite is made with ingredients you chose yourself. Once you try your first batch, don’t be surprised if these protein balls become a regular part of your weekly routine. Experiment with different flavors, share them with family and friends, and enjoy having a homemade snack that’s always ready whenever you need a quick, satisfying bite.

Related Articles

2-Ingredient High Protein Bread Recipe

Ultimate Crunchy Tuna Salad

3-Ingredient Chocolate Cloud Cakes

Creamy Chocolate Custard Dessert

You may also like

Leave a Comment