
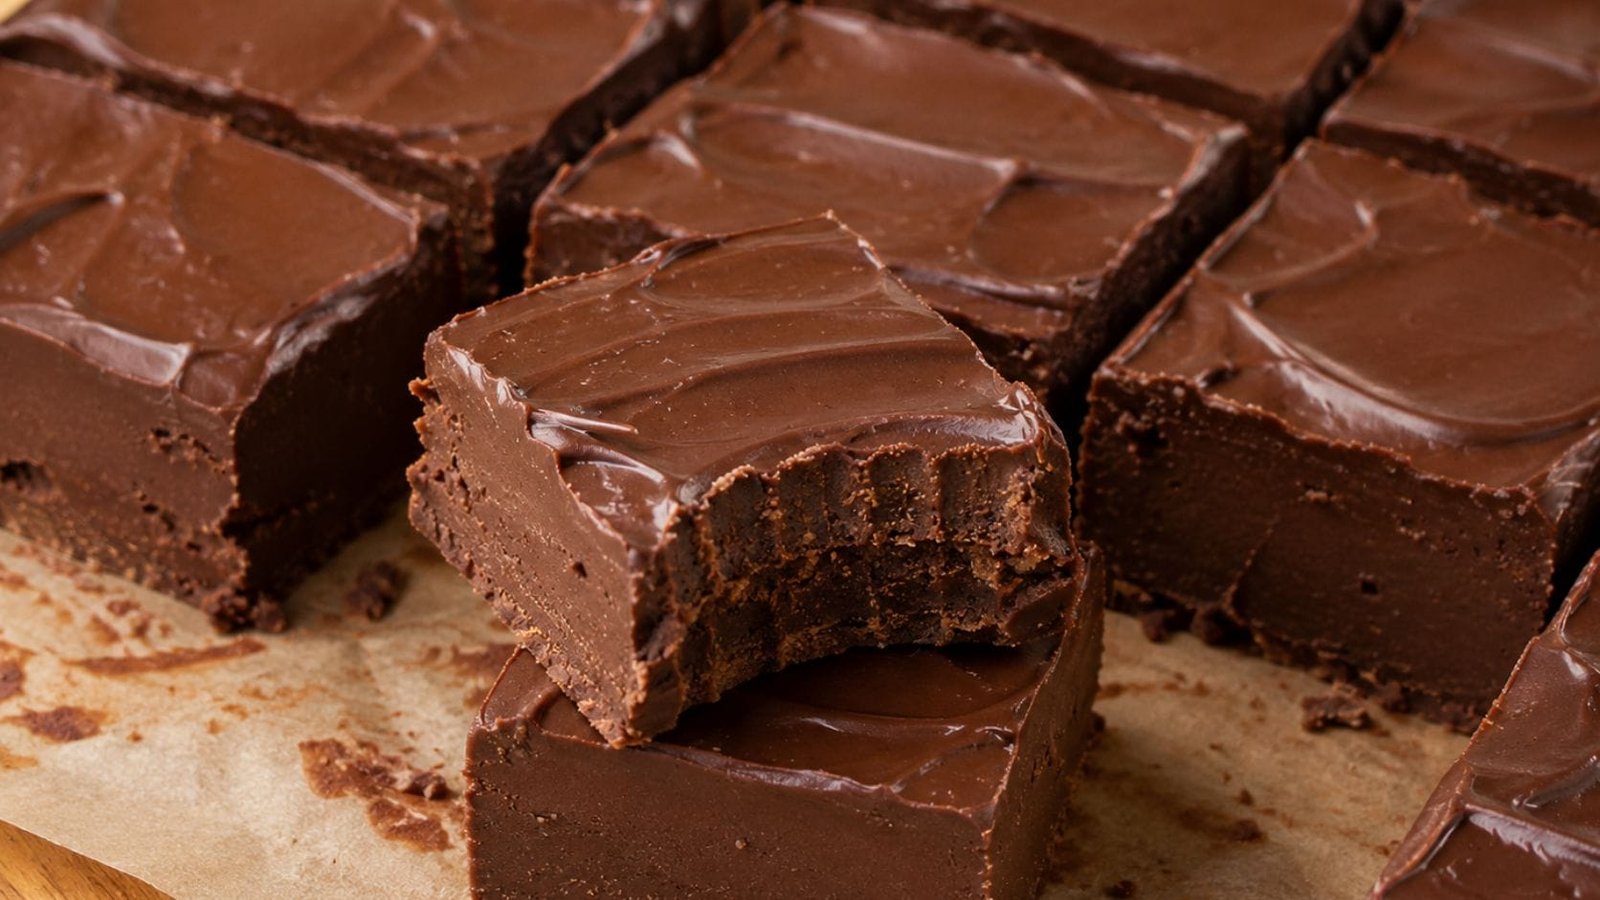
Chocolate Peanut Butter Fudge (Rich, Creamy & Impossible to Resist)
Prep Time: 10 Minutes
Chill Time: 2 Hours
Total Time: 2 Hours 10 Minutes
Servings: 16 Squares
The Chocolate Treat That Disappears Faster Than You Can Make It
Some desserts look impressive but require hours in the kitchen.
Others are quick to make but don’t taste quite as special.
Then there’s this Chocolate Peanut Butter Fudge—a recipe that delivers both incredible flavor and unbelievable simplicity.
With its silky chocolate topping, rich peanut butter center, and melt-in-your-mouth texture, every bite feels like something you’d buy from a premium chocolate shop. The surprising part is that you can make it at home with just a handful of simple ingredients.
There’s no candy thermometer to worry about.
No complicated baking techniques.
No special equipment.
Just mix, chill, slice, and enjoy.
Whether you’re preparing desserts for the holidays, a family gathering, or simply satisfying a late-night chocolate craving, this fudge is one of those recipes people ask for again and again.
But before you begin, there’s one important secret most recipes never mention.
The One Mistake That Can Ruin Homemade Fudge
Many people believe homemade fudge fails because of the ingredients.
That’s rarely the problem.
The biggest mistake is trying to cut the fudge before it’s completely chilled.
It might look firm on top, but the center often needs more time to set.
Waiting an extra 30–60 minutes gives the chocolate time to firm up completely, creating clean, bakery-style squares instead of soft, messy pieces.
Sometimes patience is the final ingredient.
Why You’ll Love This Recipe
This isn’t just another chocolate dessert.
It’s the kind of recipe you’ll keep making because it fits almost every occasion.
- No complicated techniques
- Rich chocolate flavor
- Smooth peanut butter filling
- Perfect for holidays
- Great for gifting
- Easy to prepare ahead
- Freezer friendly
- Beginner friendly
Once you’ve made it once, you’ll probably start experimenting with different flavors.
What Makes This Fudge So Creamy?
If you’ve ever wondered why bakery fudge tastes smoother than homemade versions, the answer isn’t expensive ingredients.
It’s balance.
The chocolate should be rich but not overpowering.
The peanut butter should add creaminess without making the dessert oily.
The ingredients need enough time to blend together while cooling.
When everything comes together correctly, each bite becomes soft, creamy, and packed with chocolate flavor.
Related Articles – Chocolate Peanut Butter Fudge
3-Ingredient Chocolate Cloud Cakes
Creamy Chocolate Custard Dessert
Simple Homemade Ice Cream Recipe
High Protein Peanut Butter Balls
2-Ingredient High Protein Bread Recipe
Fresh Fruit Salad Recipe
Ingredients
You’ll only need a few pantry staples.
For the Fudge
- 2 cups semi-sweet chocolate chips
- 1 cup creamy peanut butter
- 1 can sweetened condensed milk
- 2 tablespoons butter
- 1 teaspoon vanilla extract
- Pinch of salt
Optional Toppings
- Chopped peanuts
- Mini chocolate chips
- Flaky sea salt
- Chocolate drizzle
- Peanut butter drizzle
These simple ingredients create a dessert that tastes much more impressive than the effort required.
Why Every Ingredient Matters
Chocolate Chips
Good-quality chocolate creates a richer flavor and smoother texture.
Semi-sweet chocolate keeps the dessert balanced without becoming overly sweet.
Dark chocolate can also be used if you prefer a deeper chocolate flavor.
Peanut Butter
Creamy peanut butter blends beautifully into the chocolate mixture.
Natural peanut butter works well if it’s stirred thoroughly before measuring.
Sweetened Condensed Milk
This ingredient gives the fudge its signature smooth texture while adding sweetness.
It also helps the mixture set properly after chilling.
Butter
Butter adds richness while helping everything melt evenly.
Vanilla
Even a small amount of vanilla enhances the chocolate flavor.
Many people don’t notice it’s there—but they’d definitely notice if it were missing.
Before You Melt Everything Together…
Here’s a simple trick used by experienced home bakers.
Instead of melting the chocolate over high heat, use low heat and stir constantly.
Chocolate burns much faster than people realize.
Once burned, it develops a bitter taste that can’t be fixed.
Slow melting always produces smoother fudge.
Step-by-Step Instructions
Step 1
Line an 8-inch square baking pan with parchment paper or foil.
Leave a little overhang on the sides.
This makes removing the fudge much easier after chilling.
Step 2
Add the chocolate chips, peanut butter, sweetened condensed milk, and butter to a saucepan.
Heat over low heat while stirring continuously.
The mixture will slowly become glossy and smooth.
Don’t rush this step.
Slow melting creates the best texture.
Step 3
Remove the pan from the heat.
Stir in the vanilla extract and a pinch of salt.
Mix until completely smooth.
Stop Right Here…
Before pouring the mixture into the pan, taste a tiny spoonful.
Ask yourself:
Would you enjoy more peanut butter?
Would dark chocolate suit your taste better?
Would flaky sea salt make the chocolate pop?
Making these adjustments now is much easier than wishing you had after the fudge has set.
Pour and Smooth
Transfer the mixture into the prepared pan.
Use a spatula to spread it evenly into the corners.
Tap the pan gently on the countertop a few times to remove air bubbles and create a smooth surface.
If you’re adding chopped peanuts or chocolate chips on top, sprinkle them over the surface now while the mixture is still soft.
A simple finishing touch makes the fudge look even more inviting.
The Hardest Part Is Waiting
Now comes the most difficult step.
Waiting.
It may be tempting to place the pan in the freezer for a few minutes and start slicing as soon as the top feels firm.
Resist the temptation.
Great fudge isn’t just about the ingredients—it’s about allowing enough time for the chocolate and peanut butter to fully set. During this resting period, the flavors blend together, the texture becomes denser, and every slice holds its shape beautifully.
Refrigerate the pan for at least 2 hours, although overnight is even better if you have the patience.
How to Slice Perfect Fudge Squares
Once the fudge is fully chilled, lift it out of the pan using the parchment paper.
Place it on a cutting board.
For clean, professional-looking slices, run a sharp knife under hot water, wipe it dry, and cut slowly. Clean the knife after every few cuts.
This simple trick gives you neat squares instead of cracked edges.
Here’s What Happened When I Tried Two Different Methods
The first time I made this recipe, I couldn’t wait.
After only an hour in the refrigerator, I cut the fudge.
It tasted amazing—but it looked messy.
The next batch chilled overnight.
The difference was incredible.
Each square held its shape perfectly, the chocolate had a smoother texture, and the peanut butter flavor tasted richer.
Ever since then, I never rush the chilling process.
Easy Flavor Variations
One of the best things about this recipe is how easy it is to customize.
Double Chocolate Fudge
Stir extra chocolate chips into the melted mixture before chilling.
Crunchy Peanut Butter Fudge
Replace creamy peanut butter with crunchy peanut butter for added texture.
Salted Chocolate Fudge
Sprinkle flaky sea salt over the top just before chilling.
The sweet-and-salty combination is absolutely delicious.
Cookies and Cream
Fold crushed chocolate sandwich cookies into the mixture.
White Chocolate Swirl
Drizzle melted white chocolate over the top and swirl it with a toothpick.
Nut Lover’s Fudge
Mix in chopped roasted peanuts, pecans, walnuts, or almonds.
Make It Look Bakery Style
Presentation makes a huge difference.
Arrange the fudge squares on a simple white plate or wooden serving board.
Lightly drizzle melted chocolate over the top.
Scatter a few chopped peanuts around the plate.
It instantly looks like something from a bakery display case.
If you’re serving guests, they’ll probably assume it was professionally made.
Storage Tips
Chocolate Peanut Butter Fudge stores surprisingly well.
Keep it in an airtight container in the refrigerator for up to one week.
Separate layers with parchment paper so they don’t stick together.
For longer storage, freeze individual squares for up to three months.
When you’re ready to enjoy one, let it sit at room temperature for about 10 minutes before eating.
Common Mistakes to Avoid
Using High Heat
Chocolate burns easily.
Always melt the ingredients over low heat while stirring constantly.
Skipping the Parchment Paper
Without parchment paper, removing the fudge from the pan becomes much more difficult.
Cutting Too Soon
This is the biggest mistake.
Always allow enough chilling time before slicing.
Measuring Ingredients Incorrectly
Too much peanut butter can make the fudge softer.
Too much chocolate can make it firmer than expected.
Measuring carefully gives the best results.
Frequently Asked Questions
Can I use milk chocolate instead of semi-sweet chocolate?
Yes. The fudge will be sweeter and slightly creamier.
Can I use dark chocolate?
Absolutely. Dark chocolate creates a richer flavor that’s perfect for chocolate lovers.
Does this recipe need baking?
No.
Everything melts together on the stovetop before chilling in the refrigerator.
Can I freeze Chocolate Peanut Butter Fudge?
Yes.
Freeze it in an airtight container for up to three months.
Why is my fudge too soft?
It probably needs more chilling time.
If you’ve measured the ingredients correctly, refrigeration usually solves the problem.
Can I make this without peanut butter?
Yes.
Almond butter or cashew butter are excellent substitutes.
Approximate Nutrition (Per Square)
- Calories: 210–240
- Protein: 4–6g
- Carbohydrates: 18–22g
- Fat: 13–15g
- Sugar: 15–18g
Nutrition values are approximate and will vary depending on the ingredients used.
Related Recipes You May Enjoy
If you enjoyed this recipe, you might also like:
- High Protein Peanut Butter Balls
- 3-Ingredient Chocolate Cloud Cakes
- Creamy Chocolate Custard Dessert
- Simple Homemade Ice Cream
- High Protein Bread
- Fresh Fruit Salad
These recipes pair beautifully with this rich chocolate fudge and offer a variety of easy homemade treats.
Final Thoughts
Chocolate Peanut Butter Fudge is one of those timeless desserts that proves you don’t need complicated techniques to create something truly memorable. With just a few everyday ingredients and a little patience, you can make smooth, creamy fudge that’s perfect for holidays, family gatherings, homemade gifts, or simply treating yourself after a long day.
The beauty of this recipe is its flexibility. Keep it classic with chocolate and peanut butter, or customize it with nuts, cookie pieces, sea salt, or white chocolate swirls. Every batch can be a little different while still delivering the same rich, satisfying bite.
Once you make this recipe, you’ll understand why it’s a favorite in so many kitchens. One small square is often enough to satisfy a chocolate craving—but don’t be surprised if everyone comes back for a second piece.