
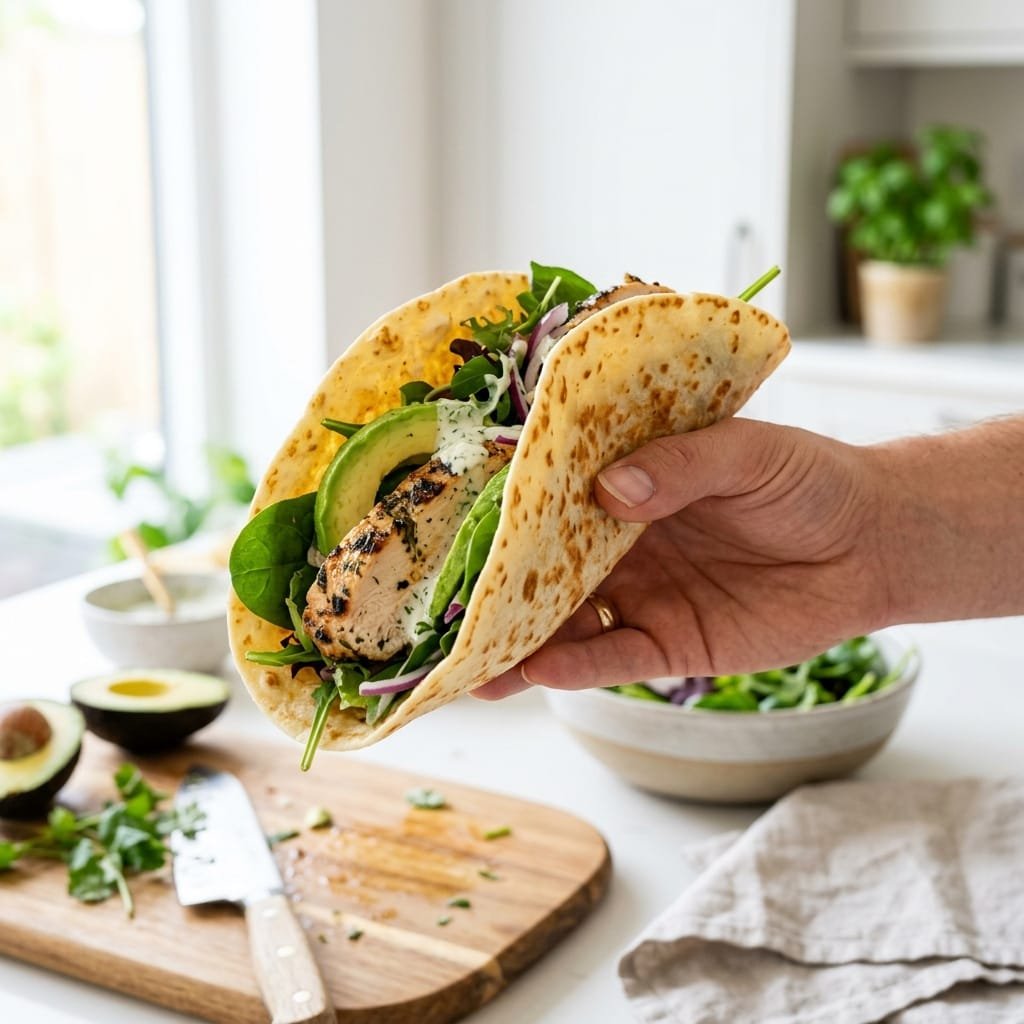
2-Ingredient Cottage Cheese Wrap: The High-Protein Bread Swap That’s Surprisingly Easy to Make
There’s something oddly satisfying about taking two ordinary ingredients and turning them into something completely different.
That’s exactly what happens with this cottage cheese wrap.
You start with cottage cheese and eggs. Blend them together, spread the mixture into a thin layer, and bake it. What comes out of the oven is a soft, flexible sheet that can be filled, folded, and rolled like a wrap.
No flour. No yeast. No complicated dough.
And while social media has pushed versions of this recipe as a “zero-carb” miracle, there’s a detail worth knowing before you make it: cottage cheese does contain carbohydrates, so this recipe is better described as a high-protein, lower-carb alternative rather than a truly zero-carb wrap.
The good news is that you don’t need exaggerated claims to make this recipe interesting. The texture, simplicity, and versatility are enough.
Why Is Everyone Making Cottage Cheese Wraps?
Cottage cheese has quietly become one of those ingredients people keep finding new ways to use.
It works in smoothies, pancakes, dips, desserts—and now wraps.
The appeal is easy to understand. Traditional tortillas and wraps are usually made from wheat or corn, while this version uses protein-rich dairy and eggs as its base.
For anyone trying to add more protein to meals or reduce their intake of traditional flour-based wraps, it offers a simple alternative.
But the biggest attraction may actually be how little effort it requires.
You don’t need to knead dough.
You don’t need to wait for anything to rise.
And you don’t need a pantry full of unusual ingredients.
Just blend, spread, bake, cool, and fill.
What Makes This Wrap Different?
A normal tortilla gets its structure from flour and, depending on the recipe, gluten or other starches.
This cottage cheese wrap works differently.
The cottage cheese provides moisture and protein, while the eggs help create structure as the mixture cooks.
Blending everything together is important because you want the cottage cheese curds broken down into a smooth mixture.
Once that mixture is spread thinly and heated, the proteins set and the water gradually cooks off.
The result isn’t identical to a flour tortilla—and it shouldn’t be expected to be.
Instead, think of it as a thin, flexible protein-rich food that can be used in many of the same situations as a wrap.
Is Cottage Cheese Wrap Really Zero Carb?
This is probably the biggest misconception surrounding the viral recipe.
No, not necessarily.
Cottage cheese naturally contains lactose, which means it contains carbohydrates.
The amount varies between brands and varieties, so there’s no single carbohydrate number that applies to every cottage cheese wrap.
Eggs contain very little carbohydrate, but they don’t make the cottage cheese portion carbohydrate-free.
If you’re following a low-carb or ketogenic eating pattern, check the nutrition label of your cottage cheese and calculate the recipe based on the exact ingredients you use.
So instead of calling this a “zero-carb wrap,” a more accurate description is:
A high-protein, lower-carb wrap made without flour.
Ingredients You’ll Need
The beauty of this recipe is that the basic version needs only two ingredients.
Cottage Cheese
1 cup cottage cheese
Full-fat, low-fat, and reduced-fat varieties can work.
The biggest difference you’ll notice between brands is moisture. Some cottage cheese is much wetter than others, and that can affect how quickly the wrap cooks.
Eggs
2 large eggs
Eggs help bind the mixture and give the finished wrap its structure.
Optional Seasonings
You can keep the recipe completely plain, or add flavor.
Good choices include:
- Garlic powder
- Onion powder
- Black pepper
- Italian seasoning
- Smoked paprika
- Chili flakes
- Everything bagel seasoning
If you’re making breakfast wraps, a little black pepper and everything seasoning can work beautifully.
For tacos, smoked paprika and chili flakes are a better match.
How to Make the Cottage Cheese Wrap
1. Preheat the Oven
Set your oven to 350°F (175°C).
Line a baking sheet with parchment paper.
Use actual baking parchment rather than wax paper.
2. Blend the Ingredients
Add the cottage cheese and eggs to a blender or food processor.
Blend until the mixture is completely smooth.
This is probably the most important step in the entire recipe.
If you leave large cottage cheese curds in the mixture, the finished wrap may have uneven areas and may be more difficult to handle.
Keep blending until the batter looks smooth and creamy.
3. Spread It Thinly
Pour the batter onto the parchment-lined baking sheet.
Using a spatula, spread it into a thin, even layer.
Try not to leave one area much thicker than another.
This matters because a thick center takes longer to cook, while thin edges can become dry before the middle is ready.
You want a consistent layer from edge to edge.
4. Bake Until Set
Place the tray in the oven and bake for approximately 25–35 minutes.
Start checking around 25 minutes.
The exact cooking time will depend on your oven, the size of your baking sheet, and how thick you spread the batter.
You’re looking for a wrap that is:
- Fully set
- No longer wet in the center
- Firm enough to handle
- Lightly golden around the edges
Don’t worry if the color isn’t exactly the same as the pictures you see online.
Texture matters more than getting a particular shade of brown.
The Step Most People Rush
Let It Cool Before Peeling
When the wrap comes out of the oven, it may feel delicate.
That’s normal.
Give it time to cool before trying to peel it away from the parchment.
As it cools, it becomes easier to handle.
Once it has cooled enough, gently loosen an edge and slowly peel the wrap away.
If the wrap is sticking badly and the center still looks wet, don’t force it.
It probably needs more cooking.
Why Did My Wrap Stick to the Parchment?
This is one of the most common problems with the recipe.
The first thing to check is whether the wrap was fully cooked.
An undercooked center contains more moisture and is more likely to stick.
The second thing to check is thickness.
If the batter was spread too thickly, the center may need significantly longer to set.
The third issue is the cottage cheese itself.
Some brands contain more liquid than others, which can make the batter wetter.
And finally, don’t try to peel the wrap immediately after removing it from the oven.
Cooling can make a big difference.
Why Did My Wrap Turn Out Rubbery?
A rubbery wrap isn’t usually caused by one single problem.
The most common causes are overcooking and excessive thickness.
Because you’re cooking a mixture dominated by eggs and dairy proteins, too much heat for too long can produce a firm, chewy texture.
For a softer result, spread the batter evenly and start checking it toward the lower end of the suggested cooking time.
You want the center cooked through—but you don’t want to dry the entire wrap out.
What If the Middle Is Still Wet?
Don’t panic.
This is usually fixable.
If the edges are cooked but the center is still soft or wet, return the tray to the oven for a few additional minutes.
Next time, try spreading the mixture slightly thinner.
You can also experiment with a different cottage cheese brand if your current one is particularly watery.
I wouldn’t immediately add almond flour, coconut flour, or psyllium husk if you’re trying to make the classic two-ingredient version.
Those ingredients change the recipe.
What Does It Taste Like?
This isn’t going to taste exactly like a flour tortilla.
The main ingredients are cottage cheese and eggs, so you’ll notice a mild dairy and egg flavor.
That’s not necessarily a disadvantage.
The relatively mild flavor makes the wrap work well with bold fillings.
Seasoning the batter also gives you a lot of control.
A plain version can work with almost anything.
A garlic-herb version is excellent with chicken.
A smoky, spicy version works particularly well for taco-style fillings.
6 Easy Ways to Use Your Cottage Cheese Wrap
Once you have the wrap made, the possibilities go far beyond sandwiches.
1. High-Protein Breakfast Wrap
Fill it with scrambled eggs, turkey sausage, cheese, avocado, and salsa.
Roll it up and serve warm.
2. Chicken Ranch Wrap
Try grilled chicken, lettuce, cucumber, tomato, shredded cheese, and ranch dressing.
3. Taco-Style Wrap
Fill it with seasoned ground beef, cheddar cheese, lettuce, salsa, and sour cream.
4. Turkey Club
Layer turkey, cooked bacon, lettuce, tomato, and avocado inside.
5. Buffalo Chicken Wrap
Add shredded chicken tossed with buffalo sauce, lettuce, and a little ranch or blue cheese dressing.
6. Breakfast Pizza
Instead of rolling the wrap, use it as a thin base and add cheese and your favorite toppings.
Return it to the oven until the cheese melts.
It won’t have the texture of traditional pizza dough, but it can make a quick protein-rich alternative.
Can You Make These Wraps Ahead of Time?
Yes, and that’s one of the reasons this recipe is useful for meal prep.
Make several wraps at once, let them cool completely, and stack them with parchment between each one.
Place them in a covered container and refrigerate.
Because the recipe contains eggs and dairy, treat the finished wraps as a perishable cooked food. USDA guidance recommends refrigerating cooked egg dishes promptly and using them within 3–4 days when properly refrigerated.
For the best texture, use them while they’re fresh and refrigerated rather than keeping them for an extended period.
Can You Freeze Cottage Cheese Wraps?
You can freeze them, although the texture may change after thawing.
To try freezing them, allow the wraps to cool completely and place parchment between individual pieces before putting them into a freezer-safe container or bag.
Thaw them in the refrigerator.
Some people may find the thawed texture perfectly acceptable, while others may prefer freshly made wraps.
Because dairy and egg mixtures can change texture after freezing, this is one area where personal preference matters.
Can You Make Them in an Air Fryer?
You can experiment with an air fryer, but the oven is generally easier for making a large wrap.
The main limitation is the size of the air-fryer basket.
If you try it, spread a smaller amount of batter into an even layer that fits your basket and keep a close eye on it.
Cooking times will vary considerably between appliances.
For the most predictable large wrap, the conventional oven method is easier.
Are Cottage Cheese Wraps Keto-Friendly?
They can fit into some low-carb or ketogenic meal plans, but don’t assume that every version automatically qualifies.
The carbohydrate content depends largely on the cottage cheese you choose and the serving size.
If you follow a strict ketogenic diet, check your cottage cheese label and calculate the carbohydrates for your actual recipe.
And if you’re following a medically prescribed diet, use the nutritional information from your specific ingredients rather than relying on social-media claims.
Are They Gluten-Free?
The basic ingredients—cottage cheese and eggs—do not naturally contain gluten.
However, if you need to avoid gluten strictly, check the labels of any packaged ingredients and seasonings you use and avoid cross-contact during preparation.
Also remember that fillings can contain gluten.
A gluten-free wrap doesn’t automatically make the entire meal gluten-free.
How Much Protein Does One Wrap Have?
Both cottage cheese and eggs contribute protein, which is one of the main reasons this recipe appeals to people looking for higher-protein meals.
But there isn’t one universal protein number.
A wrap made with one cottage cheese brand may have a different protein content from one made with another.
The number of wraps produced from the batter also affects the protein per serving.
For accurate nutrition information, use the nutrition labels from your specific cottage cheese and eggs and divide the total according to the number of wraps you make.
That is much more reliable than copying a viral “30-gram protein” claim.
Tips for Getting the Best Texture
If you want your first batch to turn out well, keep these points in mind:
Blend Longer Than You Think
Visible cottage cheese curds mean the mixture isn’t completely smooth yet.
Spread Evenly
Uneven thickness is one of the easiest ways to end up with burnt edges and a wet center.
Don’t Overbake
Once the wrap is fully set, there’s no advantage to leaving it in the oven much longer.
Let It Cool
A little patience makes peeling and handling easier.
Test Different Brands
If your wrap repeatedly turns out too wet, the moisture level of your cottage cheese could be part of the problem.
The 2-Ingredient Formula
If you want to remember the recipe without saving a complicated list, it’s incredibly simple:
1 cup cottage cheese + 2 large eggs
Blend until smooth.
Spread thinly.
Bake at 350°F (175°C) until fully set.
Cool.
Peel.
Fill.
That’s the basic formula.
Final Thoughts
The cottage cheese wrap doesn’t need exaggerated “zero-carb” claims to be worth trying.
Its real appeal is much simpler.
You can take two common ingredients, blend them together, bake them into a thin sheet, and turn that sheet into a wrap for breakfast, lunch, dinner, or meal prep.
It’s high in protein compared with many traditional wrap options, naturally flour-free, and adaptable enough to work with everything from scrambled eggs to taco meat and grilled chicken.
The biggest trick is getting the texture right.
Blend until smooth. Spread evenly. Cook until set. Let it cool before peeling.
And don’t be discouraged if your first attempt isn’t perfect. Cottage cheese varies between brands, ovens vary in temperature, and small changes in thickness can make a surprisingly big difference.
Most importantly, don’t believe every nutrition claim attached to a viral recipe.
This isn’t a magic zero-carb tortilla.
It’s something more useful:
a simple, flexible, high-protein alternative that you can actually make at home.