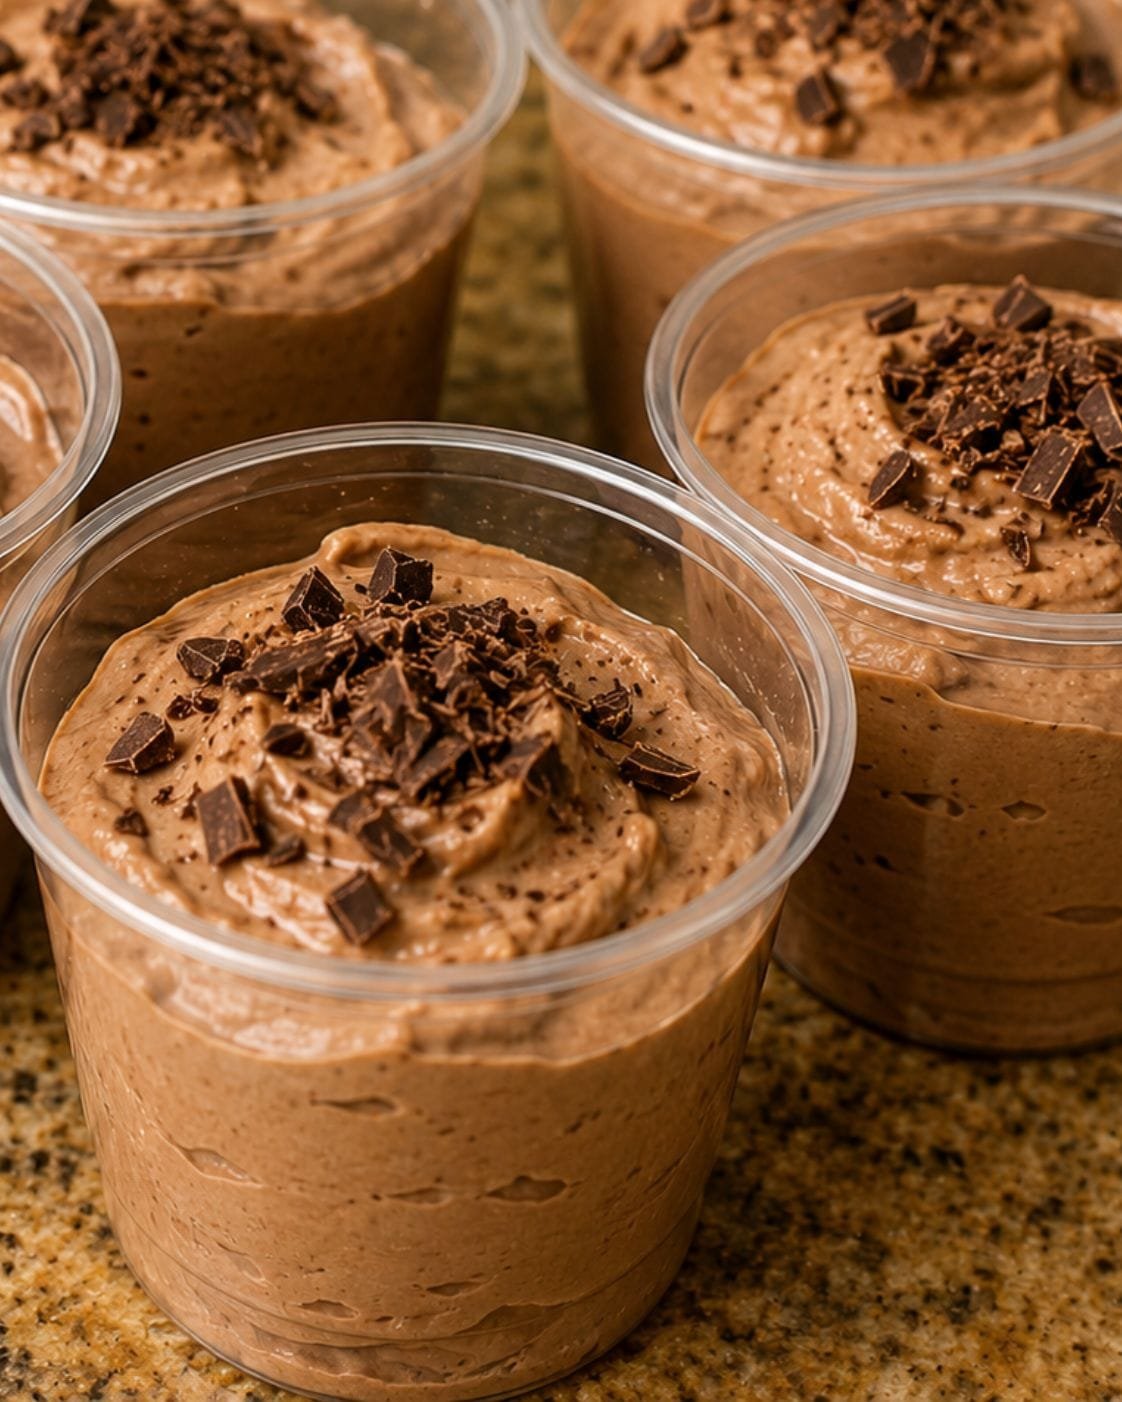
Creamy Low-Carb Chocolate Dessert Cups
Sometimes you want something sweet after dinner without making an entire cake, turning on the oven, or loading the kitchen with dishes.
That’s exactly why these creamy chocolate dessert cups are so handy.
They’re rich, smooth, chocolatey, and portioned into small cups, making them perfect for a quick dessert when you’re following a lower-carb eating style.
My sister makes a version of this whenever she wants something sweet without a traditional high-carb dessert. The funny thing is that nobody really feels like they’re missing out.
Why You’ll Love These Chocolate Dessert Cups
This dessert has that creamy, chocolate-mousse-like texture that makes it feel much more indulgent than the preparation suggests.
You don’t need a complicated baking process, and there’s no crust to prepare.
They’re also easy to portion ahead of time.
Make several cups, refrigerate them, and you’ll have an easy dessert ready whenever the chocolate craving hits.
Ingredients
For a simple version, you’ll need:
- 1 cup heavy whipping cream
- 2 tablespoons unsweetened cocoa powder
- 2–3 tablespoons powdered low-carb sweetener
- ½ teaspoon vanilla extract
For the lowest-carb result, choose ingredients that fit your particular dietary needs and check the nutrition labels.
You can also adjust the sweetness according to your taste.
How to Make It
1. Chill Your Bowl
For the best whipped texture, start with a cold mixing bowl.
You can place the bowl in the refrigerator for a few minutes before preparing the dessert.
2. Add the Cream
Pour the heavy whipping cream into the bowl.
Begin mixing at a low speed and gradually increase the speed.
3. Add Cocoa and Sweetener
Once the cream starts thickening, add the unsweetened cocoa powder and powdered sweetener.
Add the ingredients gradually so the cocoa doesn’t fly everywhere.
4. Add Vanilla
Add the vanilla extract and continue mixing.
Stop once you have a thick, creamy texture that holds soft peaks.
Be careful not to over-whip the mixture.
5. Spoon Into Cups
Divide the chocolate mixture between small dessert cups.
Smooth the tops or leave them slightly swirled for a homemade look.
6. Chill
Refrigerate the cups for at least 30 minutes before serving.
For an even firmer texture, you can chill them longer.
What Makes Them Taste So Rich?
The combination of heavy cream and cocoa creates a naturally creamy base.
Cocoa provides a deep chocolate flavor without requiring a large amount.
The vanilla helps round out the chocolate flavor, while the sweetener balances the bitterness of unsweetened cocoa.
If you’re used to very sweet desserts, you may want slightly more sweetener.
If you prefer dark chocolate flavors, start with less and taste the mixture before portioning it.
Easy Variations
Once you’ve made the basic version, it’s easy to change the flavor.
Peanut Butter Chocolate
Add a small amount of unsweetened peanut butter for a chocolate-peanut-butter combination.
Keep in mind that adding ingredients changes the nutritional profile.
Mocha
Add a small amount of instant coffee or espresso powder.
Coffee can make chocolate taste deeper without making the dessert taste strongly like coffee.
Chocolate Cheesecake
Blend in softened cream cheese for a thicker cheesecake-style dessert.
Chill it longer before serving.
Vanilla Chocolate Swirl
Prepare a small portion without cocoa and swirl it into the chocolate mixture.
The result looks pretty without requiring complicated decoration.
How to Make Them More Party-Friendly
These little dessert cups are especially convenient for gatherings.
Instead of putting one large dessert on the table, prepare individual portions.
Guests can simply grab one from the refrigerator.
For a casual family gathering, use inexpensive clear plastic dessert cups.
For a more formal dinner, small glass dessert dishes can make the same recipe look much more elegant.
Can You Make Them Ahead?
Yes.
That’s one of the best things about this dessert.
Prepare the cups ahead of time, cover them, and keep them refrigerated until you’re ready to serve.
If you’re making them for a gathering, preparing them earlier in the day can make dessert time much easier.
Avoid leaving dairy-based desserts sitting at room temperature for extended periods.
How Long Do They Last?
Because this dessert contains dairy, keep it refrigerated.
For the best texture and freshness, enjoy the cups within a few days.
Always use clean containers and utensils, and discard the dessert if it develops an unusual smell, appearance, or texture.
Tips for the Best Texture
Use cold cream.
Cold heavy cream generally whips more easily.
Don’t overmix.
Once the mixture becomes thick and creamy, stop mixing.
Use powdered sweetener.
It generally incorporates more smoothly than a coarse sweetener.
Sift the cocoa if it’s lumpy.
This helps create a smoother chocolate texture.
Chill before serving.
A short refrigeration period allows the dessert to firm up.
Is This Dessert Truly Zero Carb?
It’s important to be careful with the term “zero carb.”
The exact carbohydrate content depends on the specific ingredients and quantities used. Heavy cream, cocoa powder, sweeteners, and flavorings can all contribute some carbohydrates.
So rather than assuming a recipe is literally zero-carb, check the nutrition labels for the products you’re using and calculate the total for your serving size.
If you’re following a strict carnivore or zero-carb diet, the ingredient list may need to be modified considerably.
For a general low-carb lifestyle, however, this type of small, portion-controlled chocolate dessert can be a useful alternative to many traditional desserts.
What to Serve With Them
These chocolate cups are delicious on their own, but you can keep the toppings simple.
Try:
- A small dusting of cocoa powder
- A few sugar-free chocolate shavings
- Unsweetened whipped cream
- A tiny pinch of flaky salt
- A small amount of chopped nuts
Remember that toppings add carbohydrates and calories, so use them according to your dietary goals.
A Simple Dessert When the Chocolate Craving Hits
The biggest advantage of these cups isn’t that they’re complicated or fancy.
It’s that they’re simple.
When you want chocolate, it’s easy to end up reaching for cookies, cake, ice cream, or candy.
Having a homemade dessert already portioned in the refrigerator can make it easier to enjoy something intentionally instead of grabbing whatever happens to be available.
And because each cup is already portioned, you don’t have to cut slices or measure servings every time.
Final Thoughts
My sister’s simple chocolate dessert cups are the kind of recipe that can become a regular refrigerator staple.
They’re creamy, chocolatey, easy to prepare, and require only a handful of ingredients.
The best part is that they don’t feel like a “diet dessert.”
They feel like dessert.
If you’re trying to reduce traditional high-carb sweets, these little chocolate cups are worth experimenting with. Adjust the sweetness, try different flavors, and keep the portions small.
Sometimes the easiest way to satisfy a dessert craving is to make something simple enough that you actually want to make it again.